The Charpy impact test is a standard high-speed impact test used to measure the energy absorbed (toughness) of a material during fracture. It is simple, inexpensive, and fast, so it is widely used. However, the results are mainly for comparing materials rather than accurately predicting behavior under actual service conditions.
The test was originally developed around 1900 by S.B. Russell (USA, 1898) and Georges Charpy (France, 1901). Because Charpy made significant improvements and contributed to standardization, the test was ultimately named after him.
Charpy Impact Test Working Principle
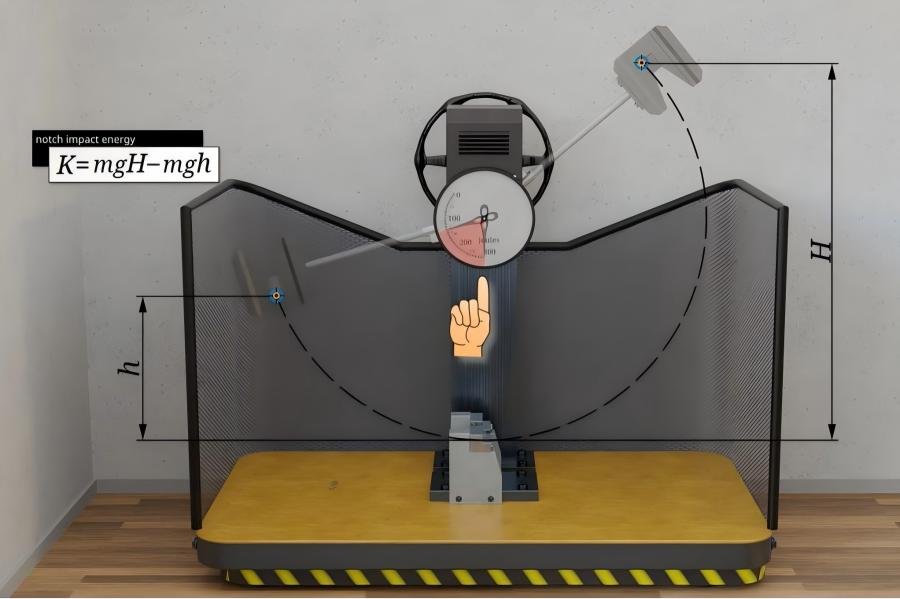
A pendulum strikes a V-notched specimen at high speed. By measuring the energy absorbed during fracture, the impact toughness (notch toughness) of the material can be determined.
Process:
Pendulum → strikes specimen (V-notch) → specimen breaks → machine reads absorbed energy
Details:
- The pendulum has a known mass and length and is released from a known height.
- The energy absorbed by the specimen is calculated from the height difference before and after fracture.
- High absorbed energy → material is tough
- Low absorbed energy → material is brittle
Charpy Impact Test Procedure
① Specimen Preparation
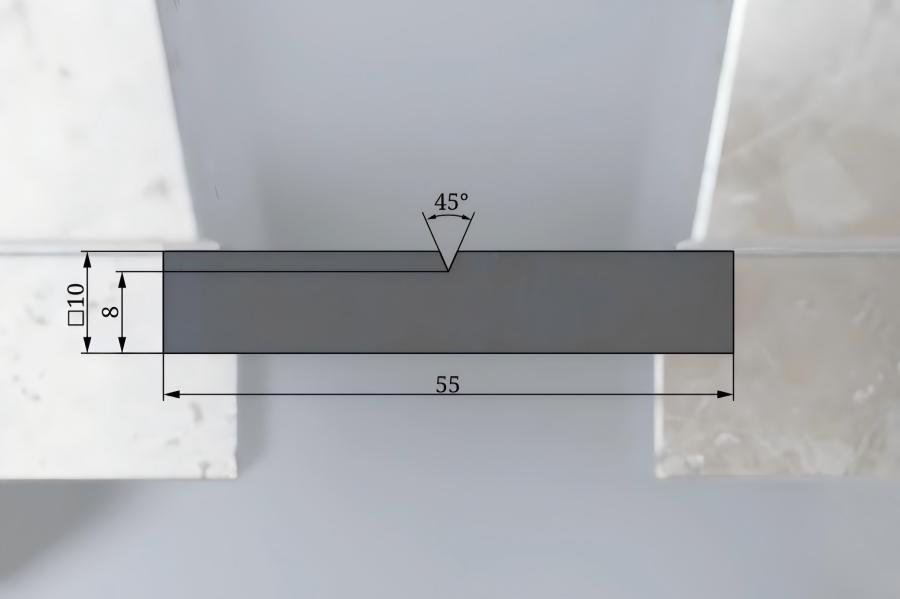
- Standard size: 10 × 10 × 55 mm (ASTM A370, EN 10045-1)
- V-notch specifications: Depth: 2 mm Angle: 45° Root radius: 0.25 mm
- Purpose: The notch concentrates stress, ensuring fracture occurs at the desired location for evaluating impact resistance under unfavorable conditions.

② Setup
- Use a pendulum-type Charpy impact machine
- Place the specimen on two supports, with notch facing away from the pendulum (tension side)
③ Test
- Raise the pendulum to a specified height and release
- The pendulum strikes the notched specimen at high speed
④ Measurement
- After breaking the specimen, the pendulum continues to swing to a lower height
- The machine calculates the Impact Energy (Joule, J) from the height difference

Result Interpretation
Quantitative: Measures the energy required for fracture (material toughness)
- Related to yield strength but no simple formula connects them
- Strain rate effects can be analyzed, though actual operating strain rates may differ
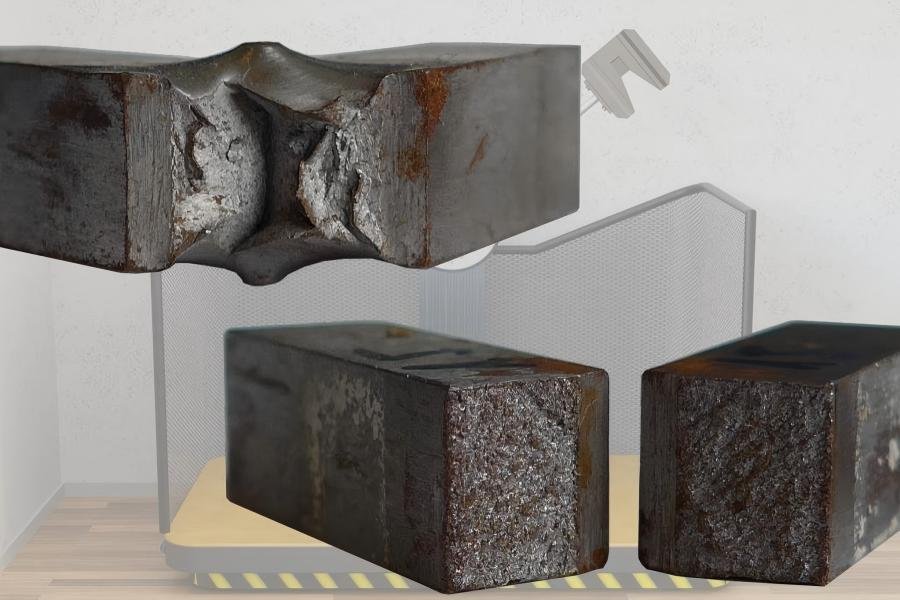
Qualitative: Determines fracture type
- Flat fracture → brittle fracture
- Jagged or shear-lip fracture → ductile fracture
- Mixed surfaces → estimate proportion of ductile vs brittle fracture

Charpy Requirements for Common Materials
| Material | Mandatory Charpy? | Standard / Typical Requirement |
| SA-350 LF2 | ✔ Yes | –46°C, ≥ 27 J (20 ft-lbs) |
| A105 | ✘ No | Only when specified; common: –20°C ≥ 27 J |
| A516 Gr.70 | ✘ No | Typically per project spec: –20°C ≥ 27 J |
Conclusion
The Charpy impact test provides a fast, cost-effective way to evaluate material toughness under high-speed impact conditions. While primarily used for material comparison, it is essential in selecting and verifying materials for low-temperature or high-stress applications, including pressure vessels, pipelines, and flanges. For precise engineering applications, always refer to the specific ASTM/ASME standards and project requirements.

